6: Waypoints
Keep Backups!
If you store important waypoints in the app, you should be sure to make regular backup copies of this data. How to do this is described on the Waypoint Export page. Do make sure that iCloud Backup is enabled, but do not rely entirely on that to keep your data safe.
Adding Waypoints to the map
Firstly, make sure that the crosshairs and co-ordinate display are shown. If not, touch the arrow button at the top right of the screen.
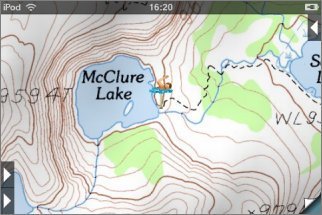
![]() Position the crosshairs at the point where you
want to place the waypoint, and touch the Add Waypoint button. The Add Waypoint screen will be
shown:
Position the crosshairs at the point where you
want to place the waypoint, and touch the Add Waypoint button. The Add Waypoint screen will be
shown:
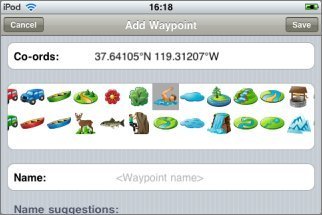
Choose a symbol to use for the waypoint's pin. (Note that the grid of available symbols can be scrolled left and right.)
Various suggestions are given for the waypoint's name. Most of these are based on nearby feature names and waypoints that you have entered in the vicinity. If nearby names end in numbers, e.g. "Camp 1", it will offer the next number in the sequence i.e. "Camp 2". To use one of the suggested names simply touch it and it will be copied into the name box.

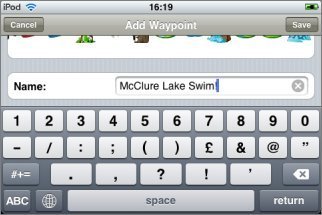
You can also type in a name or edit a suggestion by touching the name box:
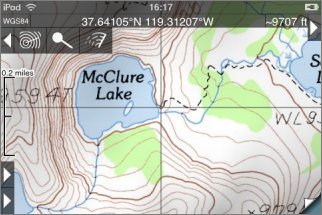
Finally touch the Save button at the top right of the screen, and the new waypoint will be shown on the map:
Other ways to add waypoints
To add a waypoint at your current location, touch the GPS button and wait for it to get an accurate fix, then touch the add waypoint button as above.
To add a waypoint at a feature from the search results, touch the search result so that the map is centered on it and then touch the add waypoint button as above.
To add a waypoint at particular co-ordinates, touch the add waypoint button and enter the co-ordinates in the co-ordinates box at the top of the screen:
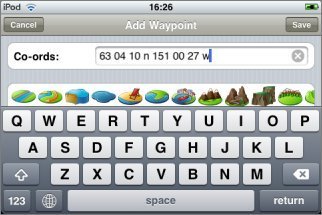
You can copy-and-paste co-ordinates into this box, e.g. from a web page or email.
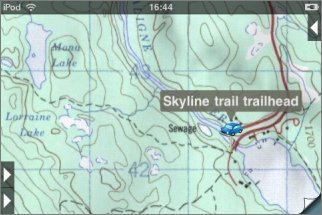
Viewing Waypoint Names
Normally, waypoints show only their pin. If you tap the pin, the name is shown in a bubble:
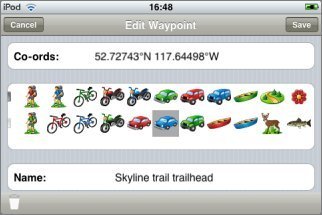
Editing Waypoints
If you tap the pin's name bubble, the Edit Waypoint screen is shown. This is essentially the same as the Enter Waypoint screen and lets you change the co-ordinates, symbol and name:
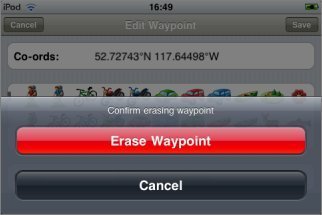
Erasing Waypoints
From the Edit Waypoint screen you can also erase a waypoint by touching the trashcan button at the bottom left of the screen:
Moving Waypoints
To move a waypoint, simply erase it from its old location as above, place the crosshairs at the new location, and touch the add waypoint button. The Add Waypoint screen will appear and will be configured with the symbol and name of the just-erased waypoint, so you can just touch Save.
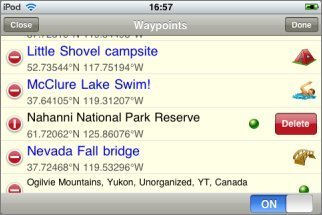
The Waypoints Screen
![]() The waypoint listing screen is shown by touching
the button that shows a group of pins. The waypoints are ordered alphabetically:
The waypoint listing screen is shown by touching
the button that shows a group of pins. The waypoints are ordered alphabetically:
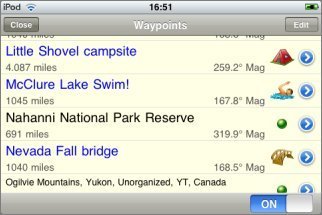
At the bottom right of the screen, a switch allows you to turn the display of waypoints on the map on and off.
Each row shows the name of the waypoint, its symbol, and either its co-ordinates or the distance and bearing from the center of the current map screen. You can change between co-ordinates and distance and bearing by touching this row for about half a second; these buttons will appear:
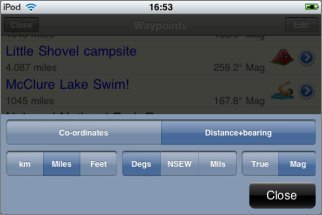
Note that the distance and bearing are from the center of the current map screen, which may or may not be your current location.
Touching a waypoint's name or symbol will go to its position on the map. Touching the blue arrow shows the Edit Waypoint screen, where you can change the name, symbol or co-ordinates.
At the top right of the screen, an Edit button allows you to more quickly erase waypoints: