Topo Maps has many features - please take a few minutes to read through the user guide to learn what it can do. If you're impatient, this Quick Start page will get you started with the essential features.
Installing Maps
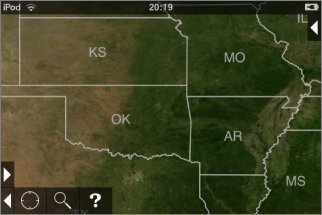
The first screen that you'll see is the U.S. index map - a satellite image, with state borders:
Groups of buttons at the top and bottom of the screen can be shown or hidden by touching the small triangular arrows.
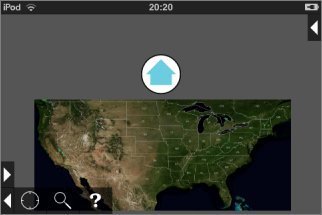
You can move around and zoom in and out on this map using the usual touch gestures. If you zoom out and move to the edge of the map, arrow buttons will appear to navigate to the other index maps:
To the North is a map of Canada and Alaska. To the West is a map of Hawaii, and to the South is a map of Puerto Rico and the U.S. Virgin Islands.
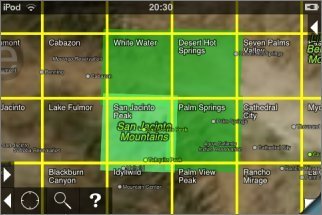
If you zoom in on any of these index maps, a yellow grid showing the individual topo maps becomes visible:
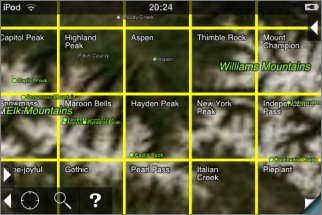
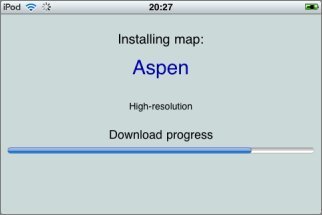
You can select one of the maps by touching it for about half a second without moving your finger. You'll then be asked whether you want to install the map:
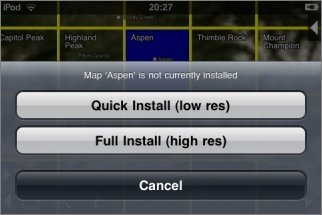
You can choose either a "Quick Install" or a "Full Install". The quick install downloads a lower-resolution version of the map; this can be useful to check whether you have the right map, or to get an overview of an area. For navigation you'll normally want to download the full version of the map.
The map will then be downloaded:
Maps that have been installed are shown in green on the index map. Low-resolution "Quick Install" maps are shown in a darker shade than high-resolution "Full Install" maps:
Viewing Maps
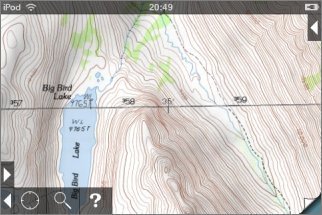
Having found and installed the map that you need, to view it simply touch the green map square for about half a second. The app will now "flip over" to show the map:
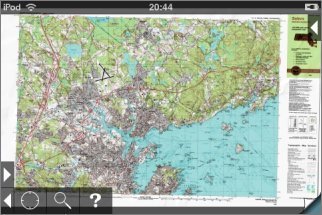
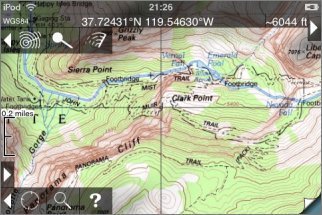
As with the index map you can move around and zoom in and out using the standard gestures:
At the bottom right of the screen a "page curl" button allows you to flip back and forth between the current topo map and the index map. (Note that when you install a new map, it does not become the current map accessible via this button until you have selected it by touching the map's green square.)
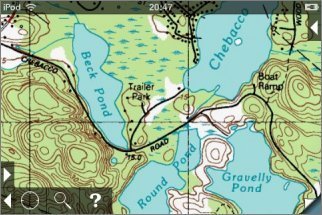
If your area of interest spans the join between two or more maps, you can mosaic them together. First, install all of the maps that you need. Now view one of the maps, and scroll to the edge. An arrow button will be shown:
Touch the arrow button, and the adjacent map will be added:
Searching
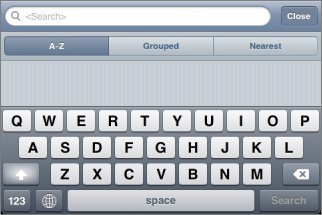
![]() You can also find the maps that you
need by searching: the app contains a database of more than a million feature names. Touch
the search button at the bottom left of the screen:
You can also find the maps that you
need by searching: the app contains a database of more than a million feature names. Touch
the search button at the bottom left of the screen:
The results are updated as you type. Features that are on maps that you've already installed are shown in blue.
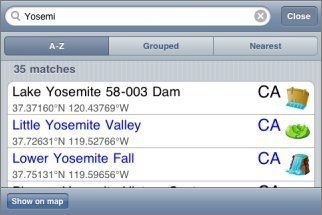
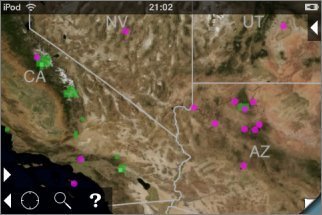
Touch a name and the map will be centered over that feature. There is also a "show on map" button that will show all of the matching features on the map as purple spots:
GPS
![]() At the bottom left of the screen, a button with
a target symbol shows your current position as reported by the GPS (or WiFi location on the
iPod touch and WiFi-only iPad):
At the bottom left of the screen, a button with
a target symbol shows your current position as reported by the GPS (or WiFi location on the
iPod touch and WiFi-only iPad):
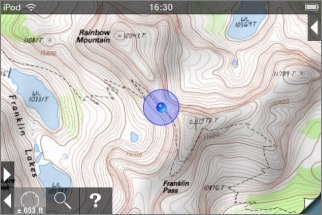
Once a fix has been received, a blue spot indicates your position and a blue circle around this indicates the estimated accuracy. The map is now locked to your position and will keep it at the center of the screen. If you touch the GPS button again it will stop tracking; touch a third time and the blue spot will be hidden.
Waypoints
To mark a waypoint, first touch the arrow button at the top right of the screen to show the co-ordinate display, crosshairs, and related buttons:
![]() Now, place the crosshairs at the center
of the screen over the spot where you want to place the waypoint and touch the "pin" button
at the top left of the screen. The Add Waypoint screen will be shown:
Now, place the crosshairs at the center
of the screen over the spot where you want to place the waypoint and touch the "pin" button
at the top left of the screen. The Add Waypoint screen will be shown:
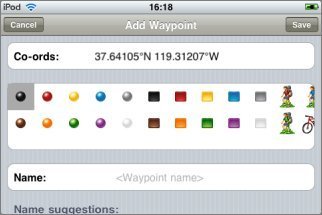
Choose a symbol for the pin. At the bottom of the screen, various suggested names for the waypoint are proposed based on nearby features. Choose one of these and/or enter the name manually by touching the "Name:" field. Then touch "Save", and the waypoint will be added to the map:
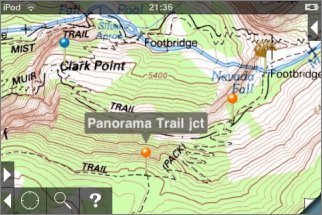
Touch a waypoint to show its name in a bubble. Touch the bubble to edit its details or erase it.
There are many more features to discover. Please see the User Guide to learn more.
(The screenshots on this page were created on iOS 6, and the appearance has changed slightly since iOS 7. The functionality is unchanged.)